Configuration Wizard
Description, Purpose and Objective
NOTE
The Configuration Assistant (Wizard) view is the guided module designed to facilitate rapid parameterization of the platform, mass creation of control tests and agile updating of analytical components.
Setup Wizard centralizes three critical workflow operations:
- General Configuration: Allows you to sequentially select and indicate the type of measurement, area, method, unit, manufacturer, lot assignment and instrument in a single tabular environment.
- Change Lots of a CC Test: Allows mass replacement or cloning of expired control lots with new lots while maintaining the test configuration.
- Change QC Test Instrument: Facilitates the reassignment of analytical tests to new equipment or analyzers without the need to redo the parameterization from scratch.
The goal of this view is to optimize system startup time and simplify periodic operational maintenance tasks.
Context of Use
This module is used by technical directors and administrators of the organization to:
- Initial start-up: Register the organization's analytical offering step by step through a unified interface.
- Renewal of Control Lots: Migrate active tests to new control lots when previous supplies expire.
- Replacement or Upgrade of Equipment: Reassign test batteries from a replaced instrument to a new one immediately.
Possible Actions
1. "General" section:
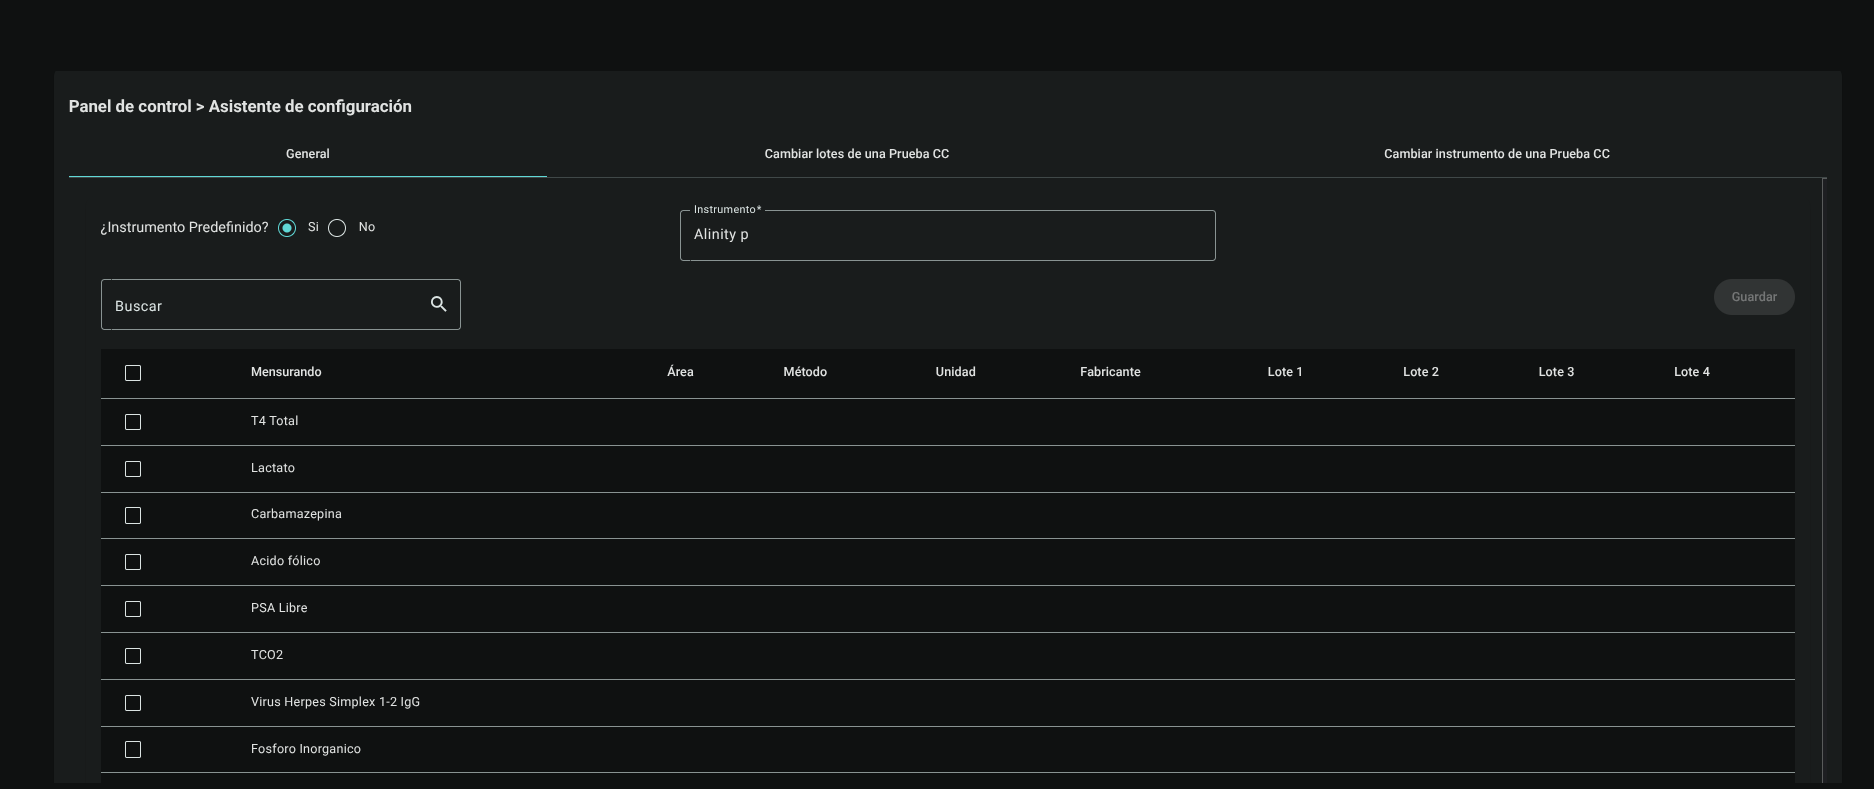
- Select the type of measurement: In the main list, check the box corresponding to the item you want to configure (e.g. a type of test or measurement). Doing so will enable additional fields for that item.

- Configure item parameters: For the selected item, display and select options in the following fields:
- Area: select the application area.
- Method: Choose the analysis method.
- Unit: Defines the unit of measurement.
- Manufacturer: select the corresponding manufacturer.
- Assign Lots: In the "Lot 1", "Lot 2", "Lot 3", etc. columns, drop down the menu and select the specific lot codes that you will apply to this configuration.

- Assign Instrument: At the top right, click on the *Instrument" field and type or select the name of the equipment or instrument that will be used for these tests.

- Save: Once the row and instrument configuration is complete, click the Save button located in the upper right corner of the table. The system will display a brief charging indicator while the initial configuration is recorded.

2. Section "Change lots of a CC Test"
- Navigate to tab: click on top tab ****Change batches of a QC Test".
- Select test: In the table below, check the box for the test you want to modify the batches for (the test name will appear as a label at the top).
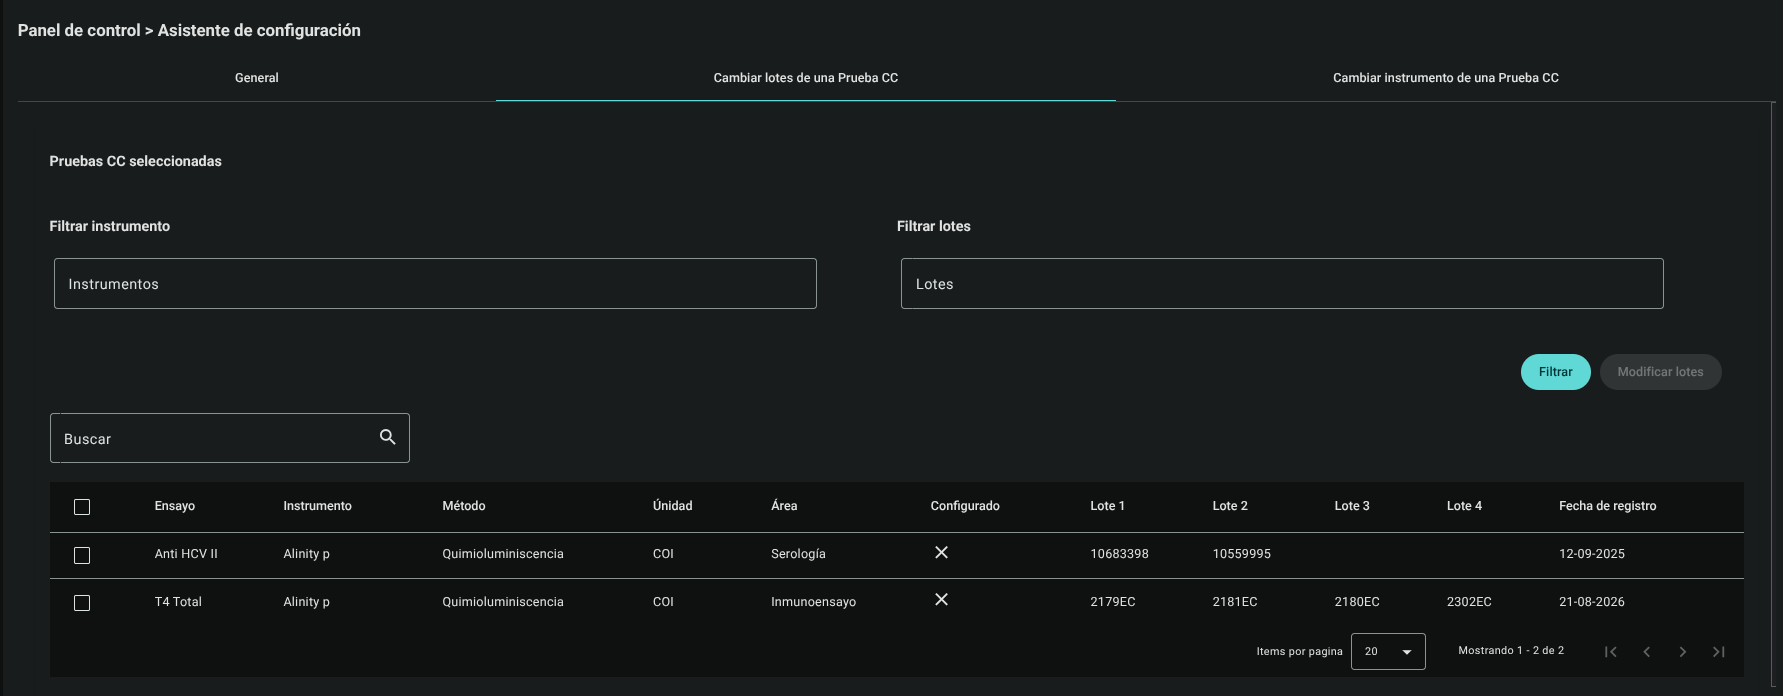
- Filter (Optional): You can use the “Filter Instrument” and “Filter Batches” fields at the top to search for specific settings. Select the desired options from the drop-down menus.

- Modify: Click the ****Modify Batches" button to apply the changes to the selected test. The button will be enabled after selecting the corresponding filters and tests.
3. Section "Change CC Test instrument"
- Navigate to tab: click on top tab ****Change CC Test instrument".
- Select the test: As in the previous step, check the box of the test to modify in the table below.
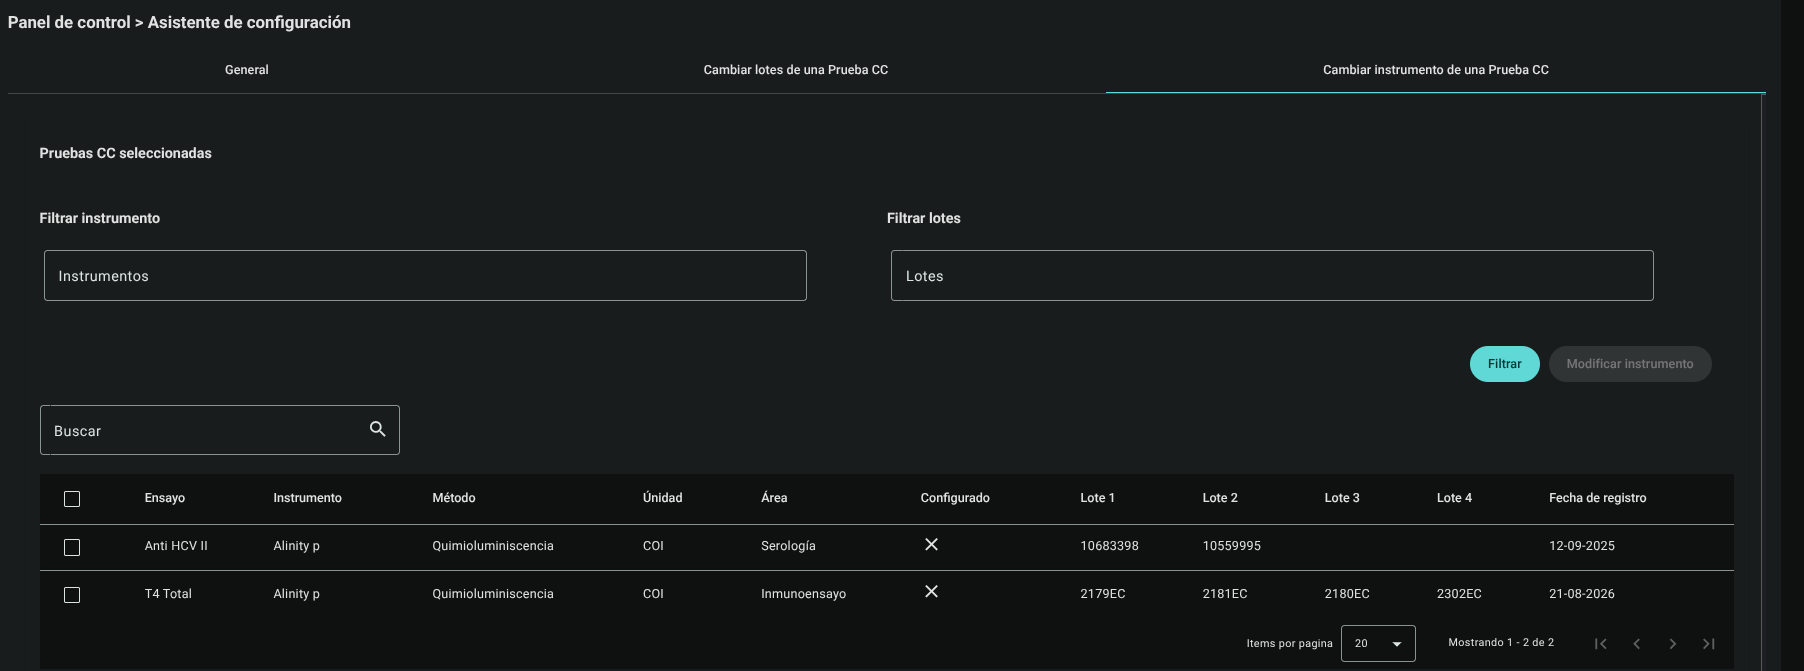
- Filter (Optional): Use the "Filter instrument" and "Filter batches" fields to find the desired configuration.
- Modify: Click the ****Modify Instrument" button (or "Filter" if the goal is just searching) to apply the changes. The action button will be enabled after confirming the parameters.
Required Technical Permits
setup_wizard_read: Allows you to view and run the general configuration wizard.copy_qctest_lot_read: Authorizes the batch migration and change tool in CC tests.copy_qctest_instrument_read: Authorizes reassignment of instruments in CC tests.